
Getting started
What you need before you start, and the five setup steps.
Last updated 17 October 2026
What you need#
- A Shopify store, and permission to install apps on it.
- An India Post business (contractual) account for the services you use, such as Speed Post or Business Parcel. It’s arranged with your India Post business development or sales team, and India Post bills you for postage under that contract.
- India Post’s API login for your customer ID. It’s different from your India Post customer portal login: see Connect India Post.
- The article ID (AWB) range India Post allotted to you.
Setup steps#
The app opens on its Setup page the first time. It lists the five required steps, what each one needs from India Post, and how far you are. Each step opens the page where it’s done; at the bottom of that page, Continue: (next step) moves on and Back to setup returns to the list. Your progress is saved, so you can stop and come back: Settings shows Continue setup until you’re done, and the Setup guide stays under Settings. While you wait for the India Post login, you can do steps 3 to 5, and in step 2 save the address (the booking office is chosen once the login is connected).
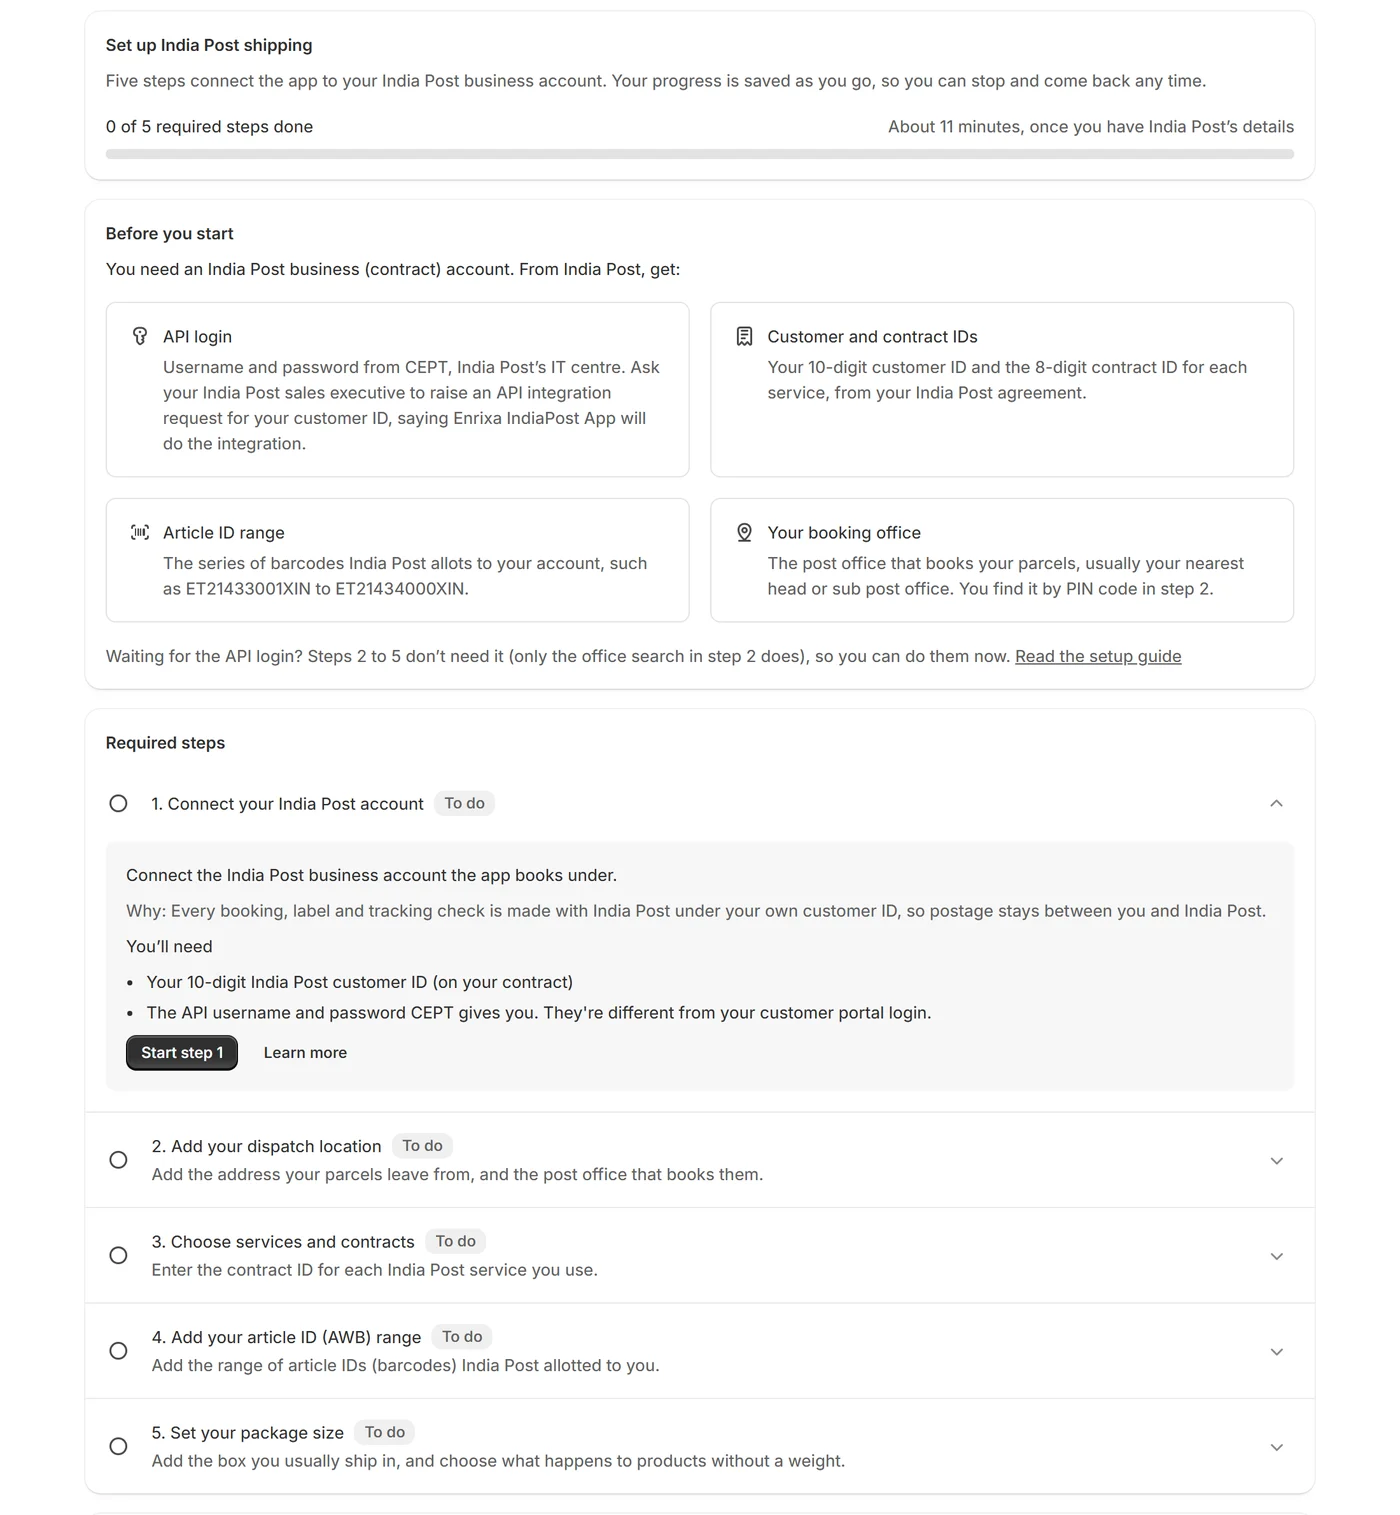
- Connect your India Post account (how): your customer ID and API login, checked live with India Post.
- Add your dispatch location (how): where parcels leave from, and the office that books them.
- Choose services and contracts (how): your contract ID for each service, and the one new orders use.
- Add your article ID range (how): the barcode series India Post allotted to you.
- Set your package size (how): the box you usually ship in, and what happens to products without a weight.
When all five are done, Settings shows “Ready for live shipping” (or, on India Post’s test system, “Test setup complete: live shipping is not enabled”).
Optional steps#
Below the required steps, Setup lists what you can add whenever you like:
- Faster tracking updates: India Post sends each scan as it happens (how).
- Emails to you: alerts when a shipment needs you, and a daily summary (how).
- Fulfillment and customer emails: automatic booking, and when orders are marked fulfilled (how).
- Order tracking on your store: a “Track your order” link for your customers (how).
- More dispatch locations: if parcels leave from more than one address (how).
Your first shipment#
Once setup is done, Setup helps you book a first parcel. New orders appear on the Shipments page by themselves. Orders placed before you installed the app aren’t brought in on their own: Import orders from the last 30 days brings them in for you to choose from. Import recent orders on the Shipments page does the same, with a date you choose up to 60 days back (see Booking parcels). On India Post’s test system you can also switch on Include test orders to try it with a Shopify test order.
Until you book one, the Shipments page shows a card for your first shipment; Hide from Shipments removes it.